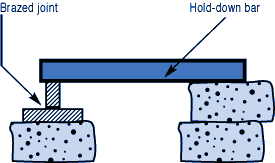
Once the parts of the assembly for your brazed joint are cleaned and fluxed, it is time to put the assembly together. If the shape and weight of the parts permit, the simplest way to hold them together is by gravity. Hold each part in position for brazing, steadying the parts in correct alignment during the heating and cooling cycles, so that capillary action can do its job.

Or you can give gravity a helping hand by adding additional weight.

If you have a number of assemblies to braze and their configuration is too complex for self-support or clamping, it may be a good idea to use a brazing support fixture. In planning such a fixture, design it for the least possible mass, and the least contact with the parts of the assembly. A cumbersome fixture that contacts the assembly broadly will conduct heat away from the joint area. Use pinpoint and knife-edge design to reduce contact to the minimum.

Designing Assembly Materials
Try to use materials in your fixture that are poor heat conductors, such as stainless steel, Inconel or ceramics. Since these are poor conductors, they draw the least heat away from the joint. Choose materials with compatible expansion rates so you won't get alterations in assembly alignment during the heating cycle. However, if you're planning to braze hundreds of identical assemblies, then you should think in terms of designing the parts themselves for self-support during the brazing process.

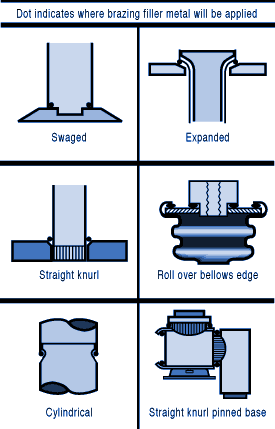
At the initial planning stage, design mechanical devices that will accomplish this purpose, and that can be incorporated in the fabricating operation. Typical devices include crimping, interlocking seams, swaging, peening, riveting, pinning, dimpling or knurling. Sharp corners should be minimized in these mechanically held assemblies, as such corners can impede capillary action.
Corners should be slightly rounded to aid the flow of filler metal. The simplest mechanical holding device is the best, since its only function is to hold the parts together while the permanent joint is made by brazing.

