There are six fundamentals of brazing that every brazer should follow to ensure consistent and repeatable joint quality, strength, hermeticity, and reliability. The six fundamentals are:
1. Good Fit and Proper Clearance
In everyday brazing, clearances are typically 0.001 to 0.005 in. radially to provide for a strong braze joint. Capillary action operates over a range of clearances, so you have a certain amount of leeway. In everyday shop practice, an easy slip fit typically will produce a sufficient braze joint between two tubular parts. Keep in mind that usually, as the clearance increases, joint strength decreases. Capillary action stops around 0.012 in. If you're joining two flat parts, you can rest one on top of the other. The metal-to-metal contact is all the clearance you'll generally need, because the average mill finish of metals offers enough surface roughness to generate capillary paths for the flow of molten filler metal. Highly polished surfaces, on the other hand, tend to inhibit filler metal flow.

Picture 1: A well brazed joint begins with a proper fit between components, .001" -- .005" of clearance.
When you're planning your joint clearances, keep in mind that brazed joints are made at brazing temperatures, not at room temperature. Take into account the coefficient of thermal expansion of the metals being joined, especially with tubular assemblies in which dissimilar metals are joined.
How much allowance you should make for expansion and contraction depends on the nature and sizes of the metals being joined and the configuration of the joint. Although many variables are involved in pinpointing exact clearance tolerances for each situation, remember this principle: Different metals expand at different rates when heated.
2. Clean Metals
Capillary action works correctly only with clean metal surfaces. If they're coated with oil, grease, rust, scale, or dirt, you must get rid of these contaminants or they'll form a barrier between the base metal surfaces and the brazing materials.
Cleaning metal parts rarely is complicated, but you have to do it in the right sequence. Oil and grease should be removed first, because an acid pickle solution intended to remove rust and scale won't work on a greasy surface. In nearly all cases you can do this either by dipping the parts into an appropriate degreasing solvent, by vapor degreasing, or by alkaline or aqueous cleaning. If the metal surfaces are covered with oxide or scale, you can remove those contaminants chemically or mechanically. For chemical removal, use an acid pickle treatment. Make sure that the chemicals are harmonious with the base metals being cleaned and that no acid traces remain in crevices or blind holes. Mechanical removal calls for abrasive cleaning.
Predominantly in repair brazing, where parts may be very dirty or seriously rusted, you can speed the cleaning process by using an emery cloth, grinding wheel, or file or grit blast, followed by a rinsing operation. Once the parts are completely clean, flux and braze them as soon as possible to lessen the chance for recontamination of surfaces by factory dust or body oils deposited through handling.
Note that particular cleaning mediums will leave a residue and embed in the surface, making it unwettable.
3. Proper Flux/Atmosphere
Flux is a chemical compound applied to the joint surfaces before brazing. Its use, with a few exceptions, is crucial in the atmospheric brazing process. This is because heating a metal surface speeds up oxide formation, the result of a chemical reaction between the hot metal and oxygen in the air. If you don't stop these oxides from forming, they'll inhibit the brazing filler metal from wetting and bonding to the surfaces.
A coating of flux on the joint area guards the surfaces from the air, preventing oxide formation. It also dissolves and absorbs any oxides that form throughout heating or that were not completely removed in the cleaning process.
You can apply flux in many ways to the joint as long as you cover the joint surfaces completely. Flux traditionally is made in a paste, so it's usually most convenient to brush it on. But as production quantities increase, it may be more effective to apply the flux by dipping: dispensing a premeasured deposit of high-viscosity flux from an applicator gun.
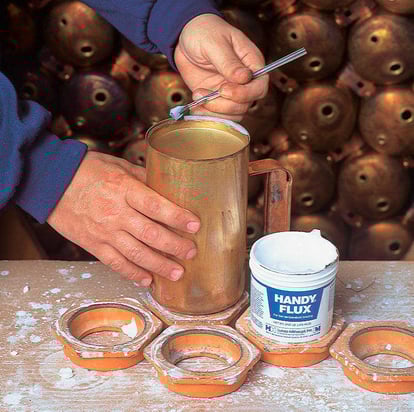
In general, you apply flux just before brazing if doable so it has the least amount of time to dry out and flake off or get knocked off the parts in handling. Choose a flux that's formulated for the specific metals, temperatures, and conditions of your brazing application.
4. Proper Fixturing
5. Proper Heating
6. Final Cleaning
The final three steps will be posted in detail in our next blog post, so check back soon! Questions? Contact us with any questions regarding the fundamentals or for assistance with your brazing needs.
